
TL;DR

Turn quiet afternoons into listening time
- Thousands of audiobooks, podcasts and originals
- Listen on your phone, tablet or Echo — also offline
- Cancel anytime
To press garden flowers, choose fresh, dry, thin blooms, arrange them between absorbent paper, and apply steady, even pressure. Thin flowers often take one to three weeks to dry, while thicker pieces may take longer; store finished flowers flat in a dry, dark place to slow fading.
A pansy tucked inside a book can keep a little piece of summer close long after the garden has gone quiet. Pressing flowers is a simple way to save their color and shape for greeting cards, bookmarks, journals, and framed art. You need fresh blooms, absorbent paper, and steady pressure; the rest is mostly patience.
This guide shows you which flowers press well, when to pick them, and how to arrange and dry them without trapping too much moisture. You’ll also learn what to do with thicker blooms, how to tell when flowers are ready, and where to keep your finished pieces so they stay in good shape. A pressed flower will change as it dries, but a little care helps its garden color linger.
Start with fresh, dry, thin blooms such as pansies, violets, cosmos, and daisies.
Pick flowers after dew has dried, remove extra leaves, and leave room between blooms.
Use absorbent paper and steady pressure; replace paper if it becomes damp.
Check for a dry, papery feel rather than relying only on a one-to-three-week estimate.
Keep finished flowers flat, dry, and out of direct sunlight to slow fading.
Press and preserve garden flowers
Pressed flowers bring garden color into cards, bookmarks, journals, and framed art. Fresh, dry blooms and steady pressure help them keep their shape.
Choose the right flowers
Flat blooms let moisture escape more easily than thick, layered flowers.
Start with thin blooms
Pansies, violets, cosmos, daisies, and small wildflowers are good choices.
Prepare them in pieces
Separate rose petals or cut a dense flower lengthwise to reduce thickness.
Prepare a fresh, dry arrangement
Pick blooms after morning dew has evaporated, then arrange them before they wilt.
- Choose firm flowers without bruises or wilted edges.
- Remove extra leaves and decide which way each flower should face.
- Use tweezers for delicate pieces and leave space between blooms.
Press with even pressure
A heavy book works for a small batch; a flower press helps organize layers.
Place each bloom between clean sheets; add protective paper inside a book.
Keep flowers flat and separate, then cover them with another sheet.
Close the book or tighten the press evenly so moisture can escape.
Check dryness, then store carefully
The calendar is only a guide: flowers are ready when they feel dry and papery.
- Replace paper if it feels damp.
- Give thicker flowers or humid batches more time.
- Avoid frequent handling while petals are fragile.
- Store flat between clean sheets of paper.
- Choose a dry, dark place away from heat and sunlight.
- Handle gently with tweezers when crafting.
Choose thin blooms for an easier first press
Flat, single-layer flowers are usually easiest to press because moisture can escape without traveling through a thick stack of petals. Pansies, violets, cosmos, daisies, and many small wildflowers are good candidates, as are fern fronds, herbs, and individual leaves. If you’re trying this for the first time, start with a few pansies rather than a full, fluffy peony.
Look closely before you pick. Fresh petals without bruises, spots, or wilted edges tend to lie flatter and look tidier when dry. For instance, a crisp purple viola from a garden border will usually press more neatly than one that has spent the afternoon drooping in the sun.
Bulky flowers can still be preserved, but you may need to prepare them in pieces. Separate a rose into petals, press only its outer petals, or cut a dense bloom lengthwise so less plant material sits in one damp layer. The result won’t look exactly like a whole fresh flower; it can still make a lovely botanical detail on a card.
Color changes are part of the process. Reds, blues, and purples may shift as they dry, and pale petals can become translucent or brown if they stay damp too long. Choose naturally vivid blooms and keep them out of sunlight while pressing, but allow for a softer, more vintage look than the flower had in the garden.
Products Worth Considering

14 Pcs Polycarbonate Greenhouse Panels, 6' x 2' x 0.24'' Twin-Wall Panels, Polycarbonate Sheet for All Weather Outdoor Garden and Greenhouse

Husqvarna 130L Gas String Trimmer, 18-Inch

Traeger Westwood Wood Pellet Grill and Smoker, 653 sq. in., WiFIRE
As an affiliate, we earn on qualifying purchases.
Pick and arrange flowers while they’re fresh and dry
Pick flowers after morning dew has evaporated, on a dry day, while the blooms still look fresh. Wet petals bring extra moisture into the press, where it can linger between paper layers. A quick walk through the garden after breakfast can work well: choose firm blooms, then bring them inside before the afternoon heat wilts them.
Before pressing, remove leaves that crowd the flower or add unnecessary thickness. Decide how you want each bloom to face: a pansy often looks lovely face down, while a sprig of tiny flowers may show better from the side. Spread curled petals gently with your fingers, and use tweezers for delicate pieces that crease easily.
Leave space between flowers so they don’t overlap or dry together. If you’re arranging a daisy and a fern on one sheet, give each its own little patch of paper. That small gap makes it easier to lift them later without tearing petals or tangling stems.
Think of the arrangement as setting a table: each flower needs room, and the nicest view deserves the place you’ll see first. For example, if you’re making a bookmark for a favorite novel, position one small bloom near the top and a leaf along the side. Planning the shape now saves fuss once the flowers are fragile.
How to press flowers with a book or flower press
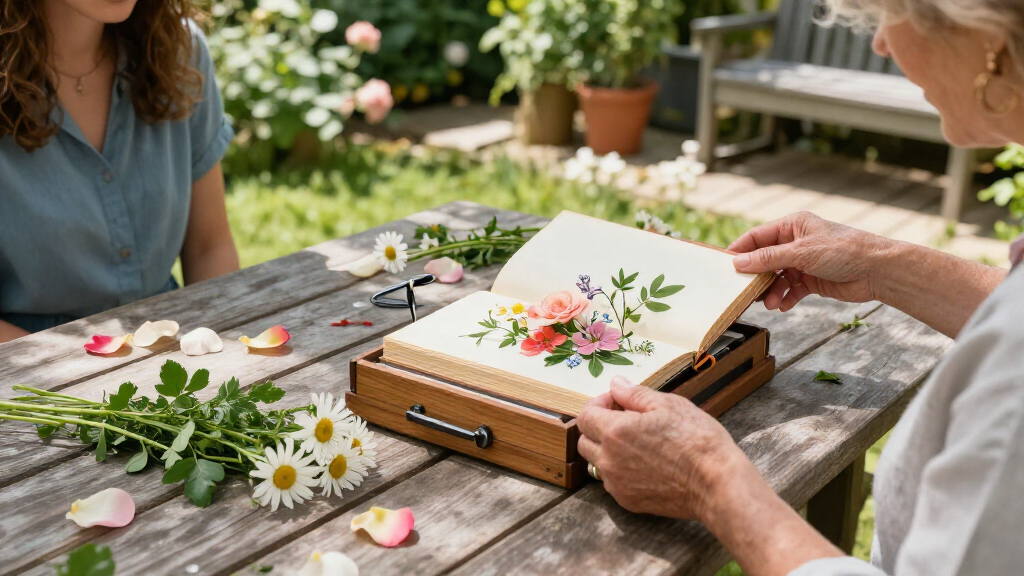
How to press garden flowers: place each bloom between absorbent sheets, arrange it flat, and apply even pressure so moisture can leave gradually. A heavy book works for a small batch, while a purpose-built flower press can help you organize several layers. Both methods rely on the same simple idea: paper absorbs moisture as pressure keeps petals from curling upward.
- Lay out absorbent paper. Use blotting paper or another clean, absorbent sheet. For a book, add protective paper so plant moisture won’t stain its pages.
- Arrange the flowers. Set each bloom face down, from the side, or with petals gently spread. Keep separate flowers from touching.
- Cover and add weight. Place another absorbent sheet over the arrangement, then close the book or tighten the press evenly.
- Check the paper. If it feels damp, replace it with dry sheets so the flowers don’t sit in trapped moisture.
- Wait for a papery feel. Thin flowers often need one to three weeks; thicker material may take longer.
For example, put two violets between sheets in the middle of a heavy book, then stack a few more books on top. Choose a volume you don’t mind exposing to possible stains, even with a protective layer. A dedicated press makes it easier to tighten layers evenly, but the book method is a simple way to get started with supplies you may already have.
Give flowers enough time to dry completely
A flower is ready when it feels dry and papery, not cool, soft, or damp. Thin blooms often take roughly one to three weeks, though humidity, flower thickness, airflow, and the pressing method all affect the timing. A thick rose petal may need longer than a thin violet, even if you pressed both on the same day.
Resist the temptation to peek every morning. Frequent handling can bend petals before they’ve dried, and opening layers too soon may let them curl. If you do check, lift a corner gently and notice the feel rather than relying only on the calendar.
Damp paper is a useful warning sign: replace it with dry paper when needed, and make sure flowers aren’t crowded together. Flowers that stay too moist may turn brown or develop mold. For instance, if a rainy afternoon leaves the room feeling humid, give a batch more time and check whether its paper needs changing.
Some crafters use microwave flower presses to shorten the wait. Timing and results vary by device and flower, so short intervals and careful checks help reduce the chance of scorching or brittle petals. If you’re new to pressing, the slower book or traditional press method makes it easier to see how a particular flower changes as it dries.
Store pressed flowers so they keep their color longer
Store pressed flowers flat in a dry, dark place, between clean sheets of paper. Moisture can soften or damage them, while direct sunlight and heat can speed fading. A closed drawer in a dry room is often a better home than a sunny windowsill, even if that windowsill makes a pretty display spot.
When you’re ready to use a flower, lift it gently with tweezers or slide a thin piece of paper underneath. Pressed petals can be surprisingly delicate; a light touch helps keep them whole. If you’re making a card, arrange the flower before applying adhesive, since shifting it once it’s in place can tear the thinnest parts.
Framing can help, but it cannot stop fading completely. UV-protective glazing may slow color loss, yet light exposure still matters. Imagine a framed cosmos in a bright kitchen: moving it to a wall away from direct sun can help the petals keep their warm pink and yellow tones longer.
For botanical art, stationery, bookmarks, or a journal page, choose a dry, clean surface and handle the finished work with care. Resin keepsakes are another craft option, but flowers should be thoroughly dry first; trapped moisture can contribute to cloudiness, discoloration, or deterioration. Follow the resin product’s directions, including its guidance on ventilation and protective equipment.
Pick the pressing method that suits your project
A book is handy for a few flowers, while a flower press makes layering easier; either can produce good results when pressure stays even and the paper absorbs moisture. Your choice depends on how many flowers you want to press and how much control you want over the layers. There isn’t one best setup for every garden or craft table.
| Method | Works well for | What to keep in mind |
|---|---|---|
| Heavy book and absorbent paper | A small batch or a first try | Protect pages; moisture can stain them. |
| Traditional flower press | Several organized layers | Tighten evenly and check for damp paper. |
| Microwave flower press | A faster experiment | Use short intervals; timing varies by flower and device. |
For instance, if you’ve gathered three daisies for a handmade card, the book method may be all you need. If you’re preparing many garden flowers for a winter craft afternoon, a press can help you sort them into layers and keep the pressure consistent.
Hanging flowers to dry gives a different result: blooms keep more of their three-dimensional form, though shape and color may change as they dry. Pressing flattens flowers, which suits paper crafts and framed art. Choose based on the keepsake you want to make, not on a promise that one technique preserves every bloom perfectly.
Frequently Asked Questions
Which garden flowers are easiest to press?
Flat, thin flowers are usually easiest, including pansies, violets, cosmos, and daisies. Ferns, herbs, and individual leaves also press well. Try one or two flowers first to learn how they dry in your home.
Can I press a rose or another thick flower?
Yes. Separate the petals or cut the bloom lengthwise so less moisture has to escape through a thick stack. The flower may not keep its whole three-dimensional shape, but its petals can make attractive details for a card or journal.
How long does it take to press flowers?
Thin flowers often take about one to three weeks, while thick blooms or humid conditions can take longer. A flower is ready when it feels dry and papery rather than cool, soft, or damp.
Can I use a regular book?
Yes. Put the flowers between absorbent sheets, add extra paper to protect the pages, and place weight on the closed book. Choose a book you don’t mind exposing to possible stains, since plant moisture can get through paper.
Why did my pressed flowers turn brown or mold?
Flowers may brown or mold if they were damp, crowded, or held in paper that stayed wet. Start with dry blooms, leave space between them, and replace damp sheets. A flower that has already begun to wilt may also wrinkle or discolor more readily.
How can I slow fading in pressed flowers?
Keep them away from direct sunlight, heat, and moisture, and store them flat in a dry, dark place. UV-protective glazing may slow fading in a framed piece, though it cannot prevent color changes entirely.
Conclusion
Start with a few fresh, dry flowers and give them room, absorbent paper, and patient pressure. Check for a papery feel before you use them, then store the finished blooms somewhere dry and dim. Your first pressed pansy may not keep every shade it wore in the garden, but it can still hold a little of that bright afternoon between its petals.