
TL;DR
Herb drying is a simple way to save fresh garden, market, or leftover herbs for cooking. Start with sturdy herbs such as rosemary, thyme, or oregano, dry them with gentle warmth and good airflow until crisp, then cool and seal them in labeled airtight jars away from heat, light, and moisture.
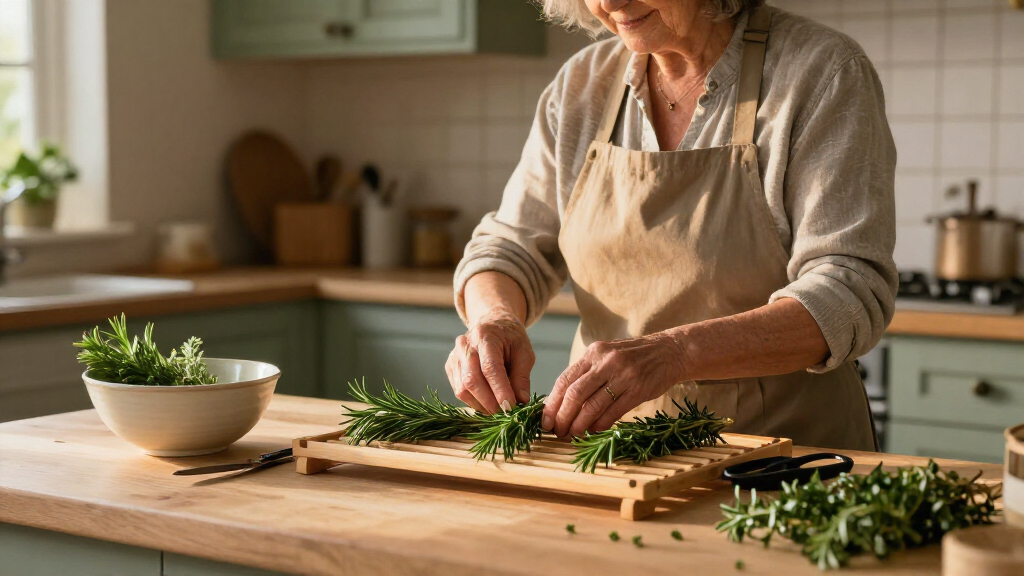
A few sprigs of rosemary hanging near the pantry can turn a spare kitchen corner into a little harvest of its own. Drying herbs is an easy way to preserve garden, market, or leftover fresh herbs, and you can begin with a clean screen, a few jars, and herbs you already enjoy using.

Turn quiet afternoons into listening time
- Thousands of audiobooks, podcasts and originals
- Listen on your phone, tablet or Echo — also offline
- Cancel anytime
This guide walks you through choosing beginner-friendly herbs, preparing them, and picking a drying method that suits your kitchen. You will also learn how to judge when the leaves are dry, keep their flavor in storage, and use them without overpowering a favorite soup or roast. Start with one small batch; the gentle, woodsy scent of thyme or oregano is a fine reward for an ordinary afternoon.
Begin with sturdy rosemary, thyme, oregano, sage, or mint, and use a small batch while you learn your kitchen’s drying conditions.
Rinse herbs only when needed, then pat them thoroughly dry; surface water can slow drying and encourage mold.
Use a dry, shaded, well-ventilated place for hanging bundles, or a clean screen, dehydrator, or closely watched low oven.
Judge readiness by texture: leaves should crumble easily and stems should snap.
Cool fully dried herbs, store them whole in labeled airtight jars away from heat, light, and moisture, and discard any damp, moldy, clumped, or musty batch.
Start a simple herb-drying hobby in your kitchen
Preserve fresh herbs with gentle drying, a texture check, and careful storage. A small first batch helps you learn what works in your kitchen.
Choose a beginner-friendly herb
Sturdy leaves are easier to manage in a first batch.
Rosemary, thyme, oregano
These sturdy herbs generally dry readily. Begin with a few healthy sprigs.
Basil, parsley, cilantro, chives
Tender, moisture-rich leaves may take longer and lose color or flavor more easily.
Prepare sprigs for airflow
Surface water can slow drying and encourage mold.
Pick healthy sprigs; shake off dirt or rinse briefly if needed.
Remove surface moisture and keep bundles loose so air can reach the leaves.
Hang in a dry, dark, ventilated place, or spread in a single layer on a clean screen.
Match the method to your kitchen
Gentle heat and good airflow help protect flavor.
- Hang small, loose bundles upside down in a warm, dry, dark place.
- Use a clean mesh screen or rack for a single layer with airflow above and below.
- Use a dehydrator’s herb setting or low temperature, following its manual.
- Use an oven on low and monitor closely; excess heat can scorch leaves or dull flavor.
Check texture, not the clock
Drying time varies with the herb, bundle size, humidity, airflow, and method.
Store herbs to keep their aroma
Cool fully dried herbs before sealing them in clean, airtight jars.
Start with herbs that forgive a beginner’s touch
Rosemary, thyme, oregano, sage, and mint are good first herbs to dry because their sturdy leaves generally dry readily. Starting with these makes the first batch easier to manage than tender, moisture-rich herbs, which can take longer or lose color and flavor more readily.
Choose healthy sprigs without dark spots, slime, or insect damage. In the garden, pick after the morning dew has dried; herbs are often most aromatic before flowering, though timing varies by plant. If you bought a bunch at the market, dry it while it is still fresh rather than waiting until it wilts in the refrigerator.
Suppose you have rosemary left after seasoning a tray of potatoes. Instead of letting the spare sprigs soften in the crisper drawer, set aside a small bunch for drying. A small first batch gives you a chance to learn what works in your kitchen without filling the counter with more herbs than you can use.
Basil, parsley, cilantro, and chives can be dried too, but their tender leaves hold more moisture and may not keep the same vivid color or fresh flavor. A dehydrator on a low setting or a carefully monitored low oven can help. If you have only a few leaves, try a thin layer on a rack and check often; a small experiment is easier to judge than a crowded tray.
Products Worth Considering

Greenworks 60V 21-Inch Self-Propelled Cordless Lawn Mower with Two 4.0Ah Batteries

Husqvarna Automower 550 Commercial Robotic Lawn Mower

Traeger Trailhead Portable Wood Pellet Grill and Smoker with Cover and Inverter
As an affiliate, we earn on qualifying purchases.
Prepare clean, dry sprigs before you hang them
Clean herbs gently and remove surface water before drying; damp leaves can dry slowly and may encourage mold. Shake loose dirt away first, then rinse briefly only if the herbs need it. Pat them dry carefully with a clean towel, including between close-packed leaves.
That simple preparation matters when you bring home a bunch of thyme after a rainy market morning. If you tie it up while the leaves are still wet, the bundle can hold moisture in its center. Spread the sprigs out for a little while after toweling them so air can reach both sides.
Pick out bruised, discolored, or damaged pieces as you go. Keep the sprigs loose enough for air to move around them; a handful packed tightly together may look tidy, but the middle can stay damp after the outer leaves feel dry. For a first attempt, a few thin stems tied together are easier to inspect than a large bundle.
Use clean hands and a clean, dry rack or screen. There is no need to turn a kitchen hobby into a complicated routine: careful handling, a quick rinse when needed, and thorough surface drying make a practical start. If any leaves already smell off or feel slimy, leave them out of the batch.
Choose a drying method that fits your kitchen
Air-drying works well in a warm, dry, dark place with good airflow; a screen, dehydrator, or low oven can suit kitchens where hanging herbs is awkward or the air is humid. The best method depends on your space, the herb, and how evenly your appliance handles gentle heat.
For an easy traditional approach, tie a few sprigs into a loose bundle and hang them upside down. A pantry corner or a dry, shaded room may work better than the kitchen itself if cooking steam makes the air damp. A sunny window looks charming, but direct light can fade the leaves, and a spot above the stove can expose them to heat and steam.
Screen-drying is handy when you have loose leaves or want to avoid hanging bundles. Spread them in a single layer on a clean mesh screen or rack so air can move above and below. Imagine a small tray of oregano resting on a spare shelf; it takes little room, and you can turn the leaves if one side seems slow to dry.
A dehydrator can give more control, especially for tender herbs or humid homes. Follow the appliance manual and use its herb setting or a low temperature. An oven may work on a low setting, but many ovens run hot enough to dull flavor or scorch leaves, so monitor closely. Air-fryer and oven “dehydrate” settings also vary; try a small batch and watch for uneven drying or excess heat.
Dry herbs until they crumble, not just droop
Dry herbs until the leaves crumble easily and the stems snap, rather than relying on a fixed number of hours. Drying time changes with the herb, leaf size, bundle thickness, humidity, airflow, and method, so texture is the more useful guide for a home batch.
After a while, check one sprig from the middle of a hanging bundle or the thickest part of a screen. If the leaves bend and feel leathery, they need more time. If they crumble readily between your fingers and the stem breaks cleanly, they are closer to ready. A middle sprig matters because the outside of a bundle may dry before its center.
Picture a bundle of sage that has hung for an afternoon. The outer leaves may feel papery, while a stem tucked inside still bends. Give the whole bundle more time and check again; taking it down too soon can leave moisture behind. On the other hand, high heat is no shortcut worth taking if it leaves the kitchen smelling of scorched leaves.
For a dehydrator or oven, follow the manufacturer’s instructions and inspect the herbs frequently. Keep batches modest until you learn how your equipment behaves. Patience protects both flavor and quality; a gentle drying process takes its cue from the leaves, not the clock on the wall.
Store your dried herbs so their aroma lasts
Cool fully dried herbs before sealing them in clean, airtight jars, then store the jars away from heat, light, and moisture. Whole leaves generally keep their aroma longer than crushed ones, so leave them intact and crumble what you need while cooking.
Think of a jar of thyme beside the stove: it is handy, but the warmth and steam from cooking can work against good storage. A cupboard or pantry shelf away from the stove and sunny window makes a better home. Label each jar with the herb and drying date so you know what you gathered when the next batch arrives.
Check the jar from time to time. Dampness, clumping, mold, or a musty smell means discard the herbs; do not taste them to decide whether they are safe. Drying reduces moisture, but it does not make contaminated herbs safe. Faded aroma without dampness or mold usually points to lost quality, so replace the batch when it no longer smells useful.
There is no single shelf-life promise that fits every jar, because storage conditions and how thoroughly the herbs dried both matter. Trust your eyes and nose, and keep moisture out of the container. A small labeled jar you can use up is often more satisfying than a large one forgotten at the back of the cupboard.
Use dried herbs with a light hand in familiar recipes
Dried herbs are more concentrated by volume than fresh herbs, but strength varies, so about one-third as much dried herb is a useful starting point. Add a little, taste the dish, and adjust rather than treating the ratio as an exact rule.
If a soup recipe asks for three teaspoons of fresh thyme, begin with about one teaspoon dried. Rub the leaves gently between your fingers as you add them to release their aroma. The warm scent should lift the pot without taking over the broth. A particularly strong batch may need even less; an older, faintly scented jar may need a little more.
Drying is also a pleasant way to preserve garden or leftover fresh herbs before they go limp. Try rosemary with roasted potatoes, oregano in a tomato sauce, or mint in a simple tea blend if that is how you already enjoy it. Familiar recipes make good first tests, because you know how the dish usually tastes.
Mark a favorite combination in your recipe notes: perhaps a pinch of sage in a bean stew or thyme in a pan of roasted vegetables. The hobby stays useful when the jars go back into regular cooking. Keep the leaves whole in storage and crush only what you are about to use; that small habit helps retain more aroma in the jar.
Make a first batch in five calm steps
A simple first batch needs a small harvest, careful surface drying, a suitable spot, patience, and a labeled jar. Give yourself one afternoon to set things up and the following days to check progress; air-drying does not need constant attention.
- Choose a sturdy herb. Pick a few healthy sprigs of rosemary, thyme, oregano, sage, or mint, after dew has dried.
- Clean and dry the surface. Shake away dirt, rinse briefly if needed, and pat the sprigs thoroughly dry.
- Set up for airflow. Tie a loose bundle for hanging or spread leaves in one layer on a clean screen. Choose a dry, shaded place away from stove steam.
- Check texture, not elapsed time. Continue drying until leaves crumble easily and stems snap; inspect the thickest part of the batch.
- Cool, jar, and label. Once fully dry and cool, seal the leaves in a clean, airtight jar and note the herb and drying date.
For instance, you might start with six or eight thyme sprigs from a pot on the windowsill. A few will season a meal fresh, while the rest can dry on a rack in the pantry. That small division lets you enjoy the garden now and save a little for a rainy day.
If the kitchen is humid or you want to dry basil, try a low-setting dehydrator in a small batch and follow its manual. Adjust the approach to your home rather than forcing one method to suit every herb. A simple hobby should feel pleasant and manageable, like setting a jar of sunshine aside for winter cooking.
Frequently Asked Questions
Which herbs are easiest to dry at home?
Rosemary, thyme, oregano, sage, and mint are friendly choices for a first batch because their leaves are generally sturdy and dry readily. Try a few sprigs of thyme on a screen before committing to a larger harvest.
Do I need to wash herbs before drying them?
Shake away dirt first and rinse briefly if the herbs need it. Pat them thoroughly dry before drying, because surface water can slow the process and encourage mold.
Can I hang herbs in my kitchen?
Yes, if the spot is dry, dark, and well ventilated. A humid kitchen, a place above the stove, or a sunny window may be a poor choice because steam, heat, or direct light can affect drying and quality.
How do I know when dried herbs are ready?
Leaves should crumble easily and stems should snap. Check the thickest part of the bundle or tray, since the outside can dry sooner than the center. The time varies with humidity, airflow, herb type, and drying method.
Can I dry basil, parsley, or cilantro?
Yes, though tender leafy herbs hold more moisture and can lose color or flavor more readily. Spread them in a thin layer with good airflow or use a dehydrator on a low setting according to its manual.
How should I store dried herbs?
Let them cool fully, then store them in clean, dry, airtight jars away from heat, light, and moisture. Whole leaves tend to retain aroma longer than crushed leaves, so crumble them just before cooking.
How much dried herb should I use instead of fresh?
A useful starting point is about one-third as much dried herb as fresh, then adjust to taste. For three teaspoons of fresh thyme, start with roughly one teaspoon dried and add more only if the dish needs it.
Conclusion
Start with a few sturdy sprigs and let their texture tell you when they are ready. Dry them gently, store them whole in a cool, dry cupboard, and crumble just enough to season supper. You do not need a grand harvest or a perfect kitchen setup to make this hobby worthwhile.
One small jar of thyme or rosemary can carry the garden’s warm, woodsy scent into a winter stew. Pick a herb you already love, and give a handful of leaves a quiet place to dry.