Choose a kitchen roasting pan that fits your oven, holds the foods you cook, and feels manageable to lift and clean. This guide is for home cooks comparing pans or checking whether a pan they own will work. No specialty cookware knowledge is needed; allow 20–40 minutes to compare options, plus a few minutes to check the pan at home.

Turn quiet afternoons into listening time
- Thousands of audiobooks, podcasts and originals
- Listen on your phone, tablet or Echo — also offline
- Cancel anytime

Cuisinart Chef’s Classic 16-Inch Stainless Steel Roasting Pan with Rack
- ✔ Material: Stainless steel with aluminum-encapsulated base
- ✔ Dimensions: 20.7 x 12 x 4.9 inches
- ✔ Weight: 7 pounds

Glad Nonstick Roasting Pan with V-Shaped Rack, 15 x 10.3 Inches
- ✔ Material: Carbon steel
- ✔ Finish: Nonstick
- ✔ Dimensions: 15 x 10.3 x 2.8 inches, excluding handles
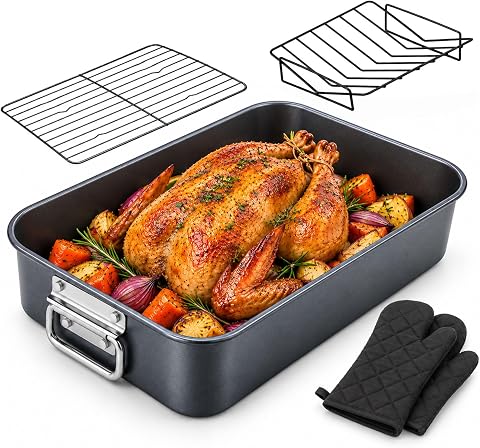
Tozaroa Carbon Steel Turkey Roasting Pan with 2 Racks and Oven Mitts
- ✔ Material: Carbon steel and stainless steel
- ✔ Thickness: 0.5 mm
- ✔ Finish: Nonstick
Difficulty: Beginner | Time: 20–40 minutes to compare and choose; 5 minutes to check fit
What You’ll Need
Tools & Materials:
- Tape measure or ruler
- Your oven’s interior width and depth measurements
- A list of foods you expect to roast
- The pan’s product dimensions and care instructions
Knowledge:
- Basic familiarity with your oven and the meals you cook
Measure the usable oven space, including any rails or protrusions that restrict the pan. Product dimensions may describe the outside rim, so check those measurements rather than relying on the cooking surface size alone.
Cuisinart Chef’s Classic 16-Inch Stainless Steel Roasting Pan with Rack
The Cuisinart Chef’s Classic earns our top spot for cooks who want one roasting pan to move between oven and cooktop. Its induction-compatible, aluminum-encapsulated base gives it an advantage over both carbon-steel pans: we can use the pan on compatible stovetops, and the base is designed to promote even heating. The removable rack lifts food above the drippings, which helps with browning and leaves those juices collected below.That flexibility comes with more weight and bulk. At 7 pounds and 20.7 inches long, it is heavier and larger than Glad’s 15-inch pan, so lifting it loaded may feel less comfortable for some cooks. Riveted handles offer a secure grip, but they become hot in the oven and need mitts. Its 500°F limit also exceeds Glad’s 464°F ceiling. Choose Cuisinart for versatility and a sturdy stainless-steel setup; skip it if compact storage or light lifting matters most. Hand-washing is recommended to protect the finish.
Pros:
- Induction-compatible base broadens stovetop use.
- Removable rack elevates food for browning and drainage.
- Oven safe up to 500°F, the highest stated limit in this group.
- Riveted handles provide a secure carrying grip.
Cons:
- Seven-pound pan is heavier than the two carbon-steel alternatives.
- Handles get hot in the oven and require mitts.
- Hand-washing is recommended to protect the finish.
Best for: Cooks who want an induction-compatible pan with a removable rack and room for larger roasts.
Not ideal for: Anyone seeking a lightweight, compact pan or a model whose handles stay cool in the oven.
Bottom line: We recommend the Cuisinart for cooks who value stovetop versatility and a substantial removable-rack design more than low weight.
“We recommend the Cuisinart for cooks who value stovetop versatility and a substantial removable-rack design more than low weight.”
Glad Nonstick Roasting Pan with V-Shaped Rack, 15 x 10.3 Inches
For smaller kitchens and everyday roasts, the Glad Nonstick Roasting Pan is the straightforward, compact choice. At 15 x 10.3 inches, excluding handles, it takes up less room than Cuisinart’s 16-inch model, and its nonstick finish is designed to release food more easily. The included V-shaped rack encourages airflow around meat, while the stated dishwasher-safe care makes cleanup convenient.Its ease of use depends on staying within the pan’s limits. Glad is not safe for stovetop, broiler, or open-flame use, unlike the Cuisinart’s induction-ready design. Its 464°F maximum is also lower than Cuisinart’s 500°F. The coating calls for nonmetal utensils and nonabrasive cleaning, so it is less carefree than bare stainless steel. Compared with Tozaroa, Glad offers one rack rather than two, but the listed weight of 3.2 pounds makes it the lighter option. Pick it for compact oven roasting and release-friendly cleanup; pass if you need a stovetop-to-oven pan or maximum rack flexibility.
Pros:
- Compact 15 x 10.3-inch pan fits smaller roasting jobs.
- Nonstick finish supports food release and cleanup.
- V-shaped rack is designed to improve airflow.
- Listed weight of 3.2 pounds is lower than Cuisinart’s.
Cons:
- Cannot be used on a stovetop, under a broiler, or over an open flame.
- 464°F oven limit is below Cuisinart’s 500°F rating.
- Requires nonmetal utensils and nonabrasive cleaners.
Best for: Cooks making modest-size oven roasts who prioritize a compact footprint and nonstick release.
Not ideal for: People who want to sear on the stovetop, use the broiler, or handle the surface with metal utensils.
Bottom line: We’d choose Glad for compact oven roasting and convenient release, provided its heat-source limits suit our cooking routine.
“We’d choose Glad for compact oven roasting and convenient release, provided its heat-source limits suit our cooking routine.”
Tozaroa Carbon Steel Turkey Roasting Pan with 2 Racks and Oven Mitts
The Tozaroa roasting pan is the most adaptable package for cooks who want options straight out of the box. It includes a flat rack and a V-shaped rack, so we can choose between a flatter support and a cradle-style setup depending on the food. Two oven mitts are included as well, a practical addition when moving a hot pan. The deep design is intended to contain juices and sauces, and the pan is described for both roasting and baking.Its range of accessories is appealing, but the construction is the main compromise. The listed 0.5 mm carbon steel is notably thin, so it may not feel as substantial as the heavier-duty build described for Glad or the stainless-steel Cuisinart. The 15 x 11-inch size also limits the room available for especially large poultry. Unlike Cuisinart, the supplied details don’t establish induction compatibility or an oven-temperature limit, so we should not assume those capabilities. Choose Tozaroa for rack choice and an included handling kit; look elsewhere if proven stovetop versatility or a heavier pan is central to comfort.
Pros:
- Includes both flat and V-shaped racks.
- Two oven mitts come with the pan.
- Deep design is intended to contain juices and sauces.
- Suitable for roasting and baking.
Cons:
- 0.5 mm carbon steel may feel less substantial than thicker pans.
- 15 x 11-inch dimensions may constrain larger foods.
- Supplied specifications do not state an oven-temperature limit or cooktop compatibility.
Best for: Cooks who want two rack configurations and included mitts for occasional roasting and baking.
Not ideal for: Buyers who need a robust, heavy-duty feel, a verified oven limit, or space for particularly large poultry.
Bottom line: We’d pick Tozaroa when rack choice and bundled mitts matter more than a heavier build or documented heat-source versatility.
“We’d pick Tozaroa when rack choice and bundled mitts matter more than a heavier build or documented heat-source versatility.”
As an Amazon Associate we earn from qualifying purchases.
Before You Start
Decide what “comfortable” means for your kitchen: manageable weight, secure handles, easy cleaning, or a size that suits your usual meals. A large, heavy pan can be useful for a holiday turkey but awkward to store and lift when empty. If you have hand, wrist, or shoulder limitations, prioritize a lighter pan with broad, firmly attached handles and test the grip in a shop when possible.
Check the manufacturer’s instructions for oven temperature limits, broiler use, dishwasher care, and stovetop compatibility. Do not assume that a nonstick coating, glass pan, or removable rack is safe for every heat source.
Step-by-Step Instructions
Step 1: List your usual roasting jobs
Write down the foods you roast most often and the largest item you expect to cook, such as a chicken, a tray of vegetables, or a large joint of meat. Note whether you want to make gravy on the stovetop or roast with a rack. This list gives you a practical basis for comparing capacity and features.
Tip:Choose for your regular meals first. A pan sized only for an occasional feast may be harder to handle and store the rest of the year.
Check: You have a short list of typical foods and know the largest one the pan must hold.
Step 2: Measure the oven and storage space
Measure the usable width and depth of an oven shelf, then measure the cabinet or drawer where you plan to store the pan. Leave room for the handles when checking both locations. Compare these figures with the pan’s outside dimensions, including its handles and rim.
Tip:Account for space needed to slide the pan onto the shelf. A pan that technically fits may be difficult to maneuver around oven walls or rails.
Check: You know the maximum outside width and depth that fit your oven and storage space.
Step 3: Choose a pan material and construction
Compare sturdy options such as stainless steel, aluminized steel, cast iron, and enameled cast iron against the manufacturer’s care and heat guidance. Consider weight, durability, cleaning needs, and whether the pan can go on your stovetop. Select a material you can safely lift and are willing to maintain.
Tip:Dark nonstick surfaces may brown food differently from shiny metal, and coatings can have temperature and utensil limits. Read the care instructions before buying.
Check: You can explain why the chosen material suits your cooking style, lifting ability, and cleaning preferences.
Step 4: Check the shape, depth, and capacity
Choose a broad, flat base for vegetables or shallow roasting and higher sides when you want to contain juices or cook a larger joint. Confirm that your largest planned meal fits without touching the oven walls. If you plan to use a rack, check that it fits the pan and leaves room for air to circulate around the food.
Tip:Very high sides can make it harder for heat to reach the sides of food. Match depth to the meals you actually prepare.
Check: The pan accommodates your largest planned item with enough room to position it and handle the pan.
Step 5: Inspect the handles and lifting comfort
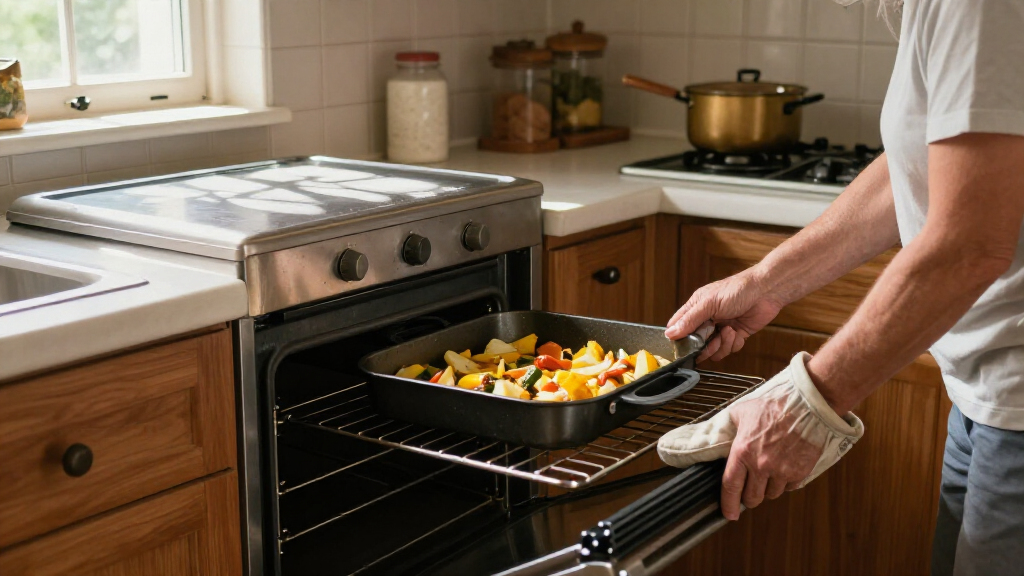
Look for broad, secure handles that give you a dependable grip, including when you wear oven mitts. If shopping in person, hold the pan as you would when taking it from the oven; if ordering online, check handle dimensions, product weight, and return terms. Think about the pan’s weight once it contains food, not only its empty weight.
Tip:Small loop handles can be difficult to grip with bulky mitts. Avoid any pan that feels unstable or strains your wrists during a dry handling check.
Check: You can hold the empty pan securely with your usual oven mitts, and its expected filled weight seems manageable.
Step 6: Review useful accessories and compatibility
Decide whether you need a rack, lid, or pour spout, then check that each accessory is included or sold separately. Verify oven temperature limits and whether the pan can be used on your cooktop if you want to make gravy directly in it. Confirm that the pan fits your oven with the rack in place.
Tip:Do not put a roasting pan across stovetop burners unless its instructions say it is safe for that use. Uneven support can make a loaded pan unstable.
Check: The pan and any accessories suit your oven, planned recipes, and intended heat sources.
Step 7: Check cleaning and storage requirements
Read the cleaning instructions and consider whether you can reach into the pan to wash it in your sink. Check whether it is dishwasher safe, whether the rack needs separate cleaning, and whether the pan nests or fits your storage space. Choose a cleaning routine you can follow without damaging the finish.
Tip:Some pans are dishwasher safe but bulky to load; others need hand washing to protect a coating or finish.
Check: You know how to clean the pan and have a practical place to store it.
Step 8: Test the fit and handling before cooking
When the pan arrives or you bring it home, remove packaging and wash it according to the care instructions. With the oven off and cool, place the empty pan on the oven shelf and confirm it slides in and out without catching. Practice gripping and lifting it with mitts, then check that it fits in storage.
Tip:Do not test an unfamiliar pan over a hot burner or with food inside. Return or exchange a pan that does not fit or feels unsafe to handle.
Check: The clean pan fits the oven and storage area, and you can lift and maneuver it securely.
Common Mistakes to Avoid
- Choosing a pan based on interior cooking area while overlooking the handles. — Compare the full outside dimensions, including handles, with your oven and storage measurements.
- Buying the largest pan available even though it is heavy or awkward. — Match capacity to your regular meals and consider the weight of the pan when filled.
- Assuming every roasting pan works on the stovetop or under the broiler. — Check the manufacturer’s heat-source and temperature instructions for the pan and its accessories.
- Ignoring how the pan will be washed and stored. — Check sink access, cleaning guidance, and cabinet dimensions before choosing.
Troubleshooting
Problem: The pan does not slide onto the oven shelf.
Solution: Measure its outside width and depth, including handles, and compare them with the usable shelf space. Exchange it for a smaller pan that leaves room to maneuver.
Problem: The pan feels difficult to lift with oven mitts.
Solution: Choose a lighter model with broader handles or a smaller capacity. Do not carry a hot, loaded pan if you cannot hold it securely; ask someone nearby for help when needed.
Problem: Food browns unevenly or the pan feels too crowded.
Solution: Use a pan with more room around the food and avoid packing vegetables tightly. Follow the recipe’s rack position and the pan maker’s instructions.
Problem: The finish stains, sticks, or becomes damaged during cleaning.
Solution: Stop using abrasive cleaners or utensils until you check the care instructions. Soak stuck-on residue if the manufacturer permits, then use the recommended cleaning method.
What Success Looks Like
You have a pan that holds your usual roasting meals, fits your oven and storage space, and can be lifted securely with your oven mitts. You have checked its heat limits, accessories, and cleaning instructions, and can describe how you will use and care for it.
Next Steps
Before the first roast, follow the manufacturer’s washing or seasoning instructions and read your recipe’s guidance for pan position and temperature. After cooking, let the pan cool as directed before cleaning it. Recheck the handles, coating, and fit if you replace your oven or change how you store cookware.
Frequently Asked Questions
What size roasting pan should I buy?
Choose a size that holds your largest regular roasting meal while fitting your oven and storage area. Compare outside measurements, including handles, with your available space.
Which roasting pan material is easiest to handle?
Handling comfort depends on the pan’s weight, shape, and grip. Compare product weights and handle dimensions, and test an empty pan with oven mitts when possible.
Can I use a roasting pan on the stovetop to make gravy?
Only if the manufacturer says the pan is compatible with your cooktop. Check the instructions for your specific model before placing it on a burner.
Do I need a roasting rack?
A rack can lift meat above the pan juices and help air circulate. It is optional for many recipes; choose one that fits securely and leaves enough room inside the pan.
How can I tell whether a pan will fit my oven?
Measure the usable oven shelf and compare it with the pan’s full outside width and depth, handles included. Check that the pan can slide in and out without catching on the oven walls or rails.