TL;DR

Turn quiet afternoons into listening time
- Thousands of audiobooks, podcasts and originals
- Listen on your phone, tablet or Echo — also offline
- Cancel anytime
A simple robot mop works best when you rinse and dry its pad, empty its tank, and keep its outlets, wheels, sensors, charging contacts, and dock clear. A few minutes of care after a run can help prevent odors, streaks, and avoidable wear, but cleaning liquids and deeper maintenance should follow your model’s manual.
A robot mop can finish its rounds while you put the kettle on, but it still needs a little care when the floor is done. A damp, dirty pad left folded against the machine can smell sour by morning, and water left in a tank can leave residue behind. These are small chores, yet they make a real difference to how well the robot cleans.
This guide shows you a simple after-run routine for the pad and tank, then explains how to check outlets, wheels, sensors, charging contacts, and docks. You’ll also learn what to do about streaks or odors, and when a recurring problem calls for the manual or manufacturer’s help. Your model’s instructions matter: parts, schedules, and approved liquids vary.
Think of the robot as a garden cart after a muddy afternoon. A quick rinse and a clear wheel keep it ready for the next trip. You don’t need to fuss over it every day, but a few minutes of maintenance to keep it clean can spare you a bigger cleanup later.
Rinse or wash the mop pad after each run and let it dry fully before storing it.
Empty the tank after use and use only water or cleaning products approved for your exact model.
Check outlets, wheels, sensors, charging contacts, and dock trays when you notice a cleaning or navigation change.
Replace pads and filters based on their condition and the manual’s guidance; there is no universal schedule.
Treat ongoing leaks, charging trouble, strange noises, or repeated errors as signs to consult the manufacturer.
Simple Robot Mop Maintenance Keep It Running
A few minutes of care after a run can help prevent odors, streaks, poor navigation, and avoidable wear. Follow your model’s manual for cleaning methods and approved liquids.
A simple after-run routine
These small habits help keep the robot ready for its next clean.
Wash it as directed and let it dry fully before storing or reattaching it.
Pour out leftover water and rinse the tank if your manual recommends it.
Use only water or cleaning products approved for your exact model.
Check the parts that affect cleaning
Inspect when cleaning, movement, or navigation changes.
Outlets and tank
Check for blockages and make sure the tank sits correctly if wetting looks uneven.
Wheels and moving parts
Gently clear hair and debris so wheels, mop plates, and brushes can move freely.
Sensors and contacts
Wipe with a soft, dry cloth unless your manual specifies another method.
Trays and tanks
Clear debris and clean wash trays, containers, and filters as directed.
Let condition guide replacement
Wear varies with use, pets, water hardness, and the robot’s design.
- Replace it if torn or persistently stained.
- Replace it if it smells bad once dry or no longer cleans well.
- Clean or replace filters and brushes according to the manual.
- Follow the maker’s schedule for deeper cleaning and consumables.
Know when routine care is not enough
Self-washing docks and smart navigation reduce hands-on work, but they still need cleaning and model-specific settings.
- Persistent leaks or charging failures
- Unusual noises after clearing visible debris
- Repeated navigation errors
Rinse and dry the pad after every run
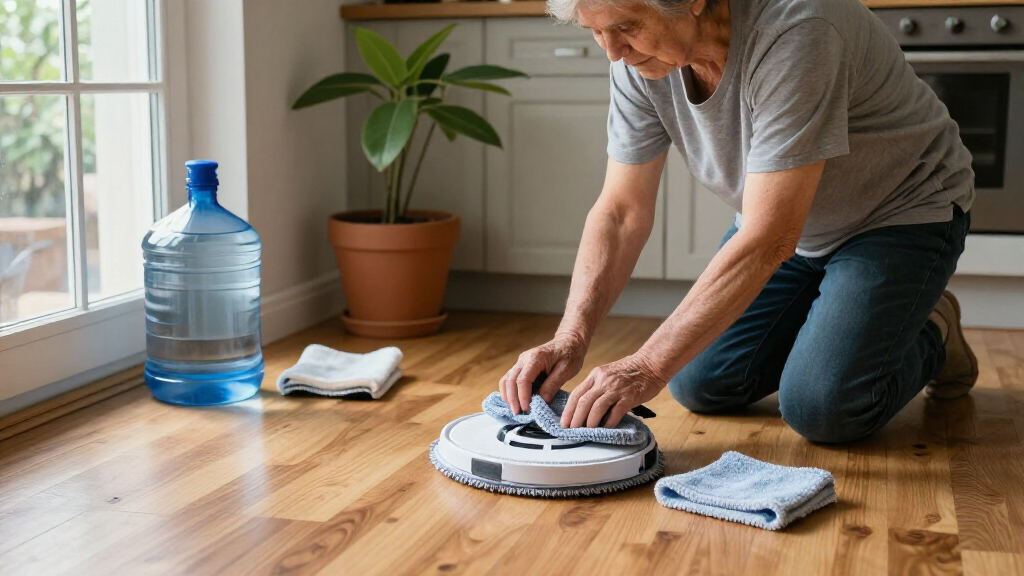
Simple robot mop maintenance starts with the pad: remove it after each run, rinse or wash it as the manual directs, and let it dry fully before you store or reattach it. A pad that stays damp can hold soil and develop an unpleasant smell, while one loaded with grit may leave streaks across a clean floor.
Imagine the robot has just crossed the kitchen after supper. The pad has picked up a few crumbs, a faint splash by the sink, and the film of everyday dust. Rinse it until the water runs clear, then hang it where air can move around it, much like a dishcloth on a sunny line. If your model allows machine washing, follow its temperature and detergent directions.
Check the fabric as you handle it. Replace a pad that is torn, stays stained after washing, smells bad once dry, or no longer lifts grime effectively. There is no single replacement interval for every home; a pet-friendly house with muddy paw prints may use pads harder than a quiet room cleaned once a week.
Some robots wash or dry pads at the dock, but that feature doesn’t make the pad invincible. Look at it now and then, and clean the wash tray as the manual instructs. A self-washing station is a helpful assistant, not a substitute for noticing when the cloth needs attention.
Products Worth Considering

HOOYEAH 6 x 6 ft Polycarbonate Walk-In Greenhouse

EGO POWER+ CS1611 16-Inch Cordless Chainsaw with 56V 2.5Ah Battery and Charger

Garvee 6 × 8 ft Walk-In Polycarbonate Greenhouse
As an affiliate, we earn on qualifying purchases.
Empty the tank and use only approved liquids
Empty the water tank after cleaning and rinse it if your manual recommends that step. Avoid leaving standing water or leftover solution inside between runs, especially if the robot will sit for several days. Water and residue can contribute to odor or buildup, and an incorrect liquid may harm the system.
It can be tempting to add a splash of vinegar, a drop of essential oil, or your favorite floor detergent so the room smells like a spring garden. Resist that impulse unless the manufacturer explicitly approves that product and amount. Some liquids can leave residue, clog outlets, or damage seals and other parts. Use the water type and cleaning solution specified for your model.
For example, after mopping a sunny breakfast nook, you might remove the tank, pour out the remaining water, and leave the reservoir open to dry if the manual permits. If the tank has a cap or removable insert, check that it sits correctly before the next run. A poorly seated tank can lead to weak or uneven wetting.
Water hardness can affect how often you notice mineral deposits, but there is no safe universal descaling recipe. Check the manual before treating the tank or outlets. If it gives no approved descaling method, don’t improvise with acids or household cleaners; ask the manufacturer what is safe.
Clear water outlets before they leave dry tracks
Robot mop water outlets need a clear path to wet the pad evenly. If an outlet is blocked by debris or mineral buildup, the robot may leave dry patches or clean one side of the floor better than the other. Check the reservoir area and outlets as described in your manual, and only use the cleaning method it approves.
Picture a narrow garden hose with a little grit lodged near the nozzle. Water still comes through, but the spray turns uneven. A robot’s outlets are smaller, so a bit of residue can matter. If you notice a pale track across the hallway or a pad that feels dry on one edge, check the tank seating and outlets before assuming the machine has failed.
Keep the inspection gentle. Don’t poke openings with a pin or sharp tool unless the manual explicitly says to; a scratch or damaged valve can create a new problem. If the maker recommends a soft cloth or a particular brush for a removable part, use that method and let components dry as directed before reinstalling them.
How often to check depends on use, water hardness, and the robot’s design. You might inspect outlets during a weekly tidy if you mop often, or when uneven wetting first appears if you run the machine occasionally. The useful clue is the floor itself: consistent dampness and even cleaning suggest the water system is doing its job.
Free the wheels and moving parts from hair
Clear hair and debris from wheels and moving parts so the robot can roll and turn freely. Check wheel wells, mop plates, and any brush or roller assembly your model has. Tangles can interfere with movement, while debris caught underneath may affect navigation or leave a mess in the robot’s path.
In a home with a long-haired dog, a few loose strands can wind around a wheel after several trips through the hall. The robot may then hesitate at a doorway or turn in a lopsided circle. Turn it off and follow the manual’s instructions for access, then remove loose hair gently. Avoid pulling hard on a part that feels stuck.
Think of the wheels as the feet of a little farm cart: they need room to turn, but they don’t need elaborate treatment. A quick look every so often—and sooner if the robot starts moving oddly—can catch a tangle before it becomes a knot. If the machine has a vacuum brush or roller, include it in the check.
Some newer combination machines lift or detach mop pads around carpets, and others rely on mapping and obstacle recognition. Make sure movable parts can travel as intended, and check that map settings match your rooms. If an unusual noise continues after you clear visible debris, stop and consult the manual rather than forcing the wheel or plate.
Wipe sensors and contacts for steadier navigation
Clean sensors and charging contacts with a soft, dry cloth, unless your model’s instructions call for another method. Dust on navigation sensors may affect how the robot moves, and dirty charging contacts can interrupt a reliable connection with the dock. Small cleanups can help the machine find its way and return home.
Suppose your robot suddenly bumps a familiar chair leg or misses the usual route to the kitchen. Before changing every map setting, inspect the sensors for dust and smudges. Wipe gently, taking care not to press hard or use a wet cleaner unless the manual allows it. If the robot uses a camera or other visible sensor, keep that area clear as directed.
For charging trouble, check both the robot’s contacts and the corresponding dock points. A dry cloth is often the simplest starting point, but follow your manufacturer’s specific instructions. Then make sure the machine is aligned on the dock and that nothing—such as a loose rug edge—keeps it from seating properly.
Newer models may combine mapping with obstacle recognition or adjust cleaning behavior through sensors. That extra cleverness makes clear sensors and up-to-date map settings more useful, though the exact setup varies. If navigation errors repeat after cleaning and checking the map, note the error message and consult the manual or manufacturer.
Give self-cleaning docks a little attention too
A self-cleaning dock still needs regular care because it can collect dirty water, detergent residue, hair, and damp odors. Empty dirty-water containers, rinse wash trays, and maintain filters or drying parts according to the schedule in your model’s manual. The dock does helpful work, but it is still part of the cleaning system.
After several kitchen cleanups, a wash tray may hold crumbs and gray water even if the mop pad looks fresh. A few minutes to empty the container and rinse the tray can stop yesterday’s grime from meeting tomorrow’s clean pad. Drying components also need the airflow and cleaning attention your model’s instructions specify.
Some recent models add automatic pad drying, detergent dispensers, heated washing, or sensors that adjust water use. These features can cut down on hands-on work, but they don’t remove the need to check containers and trays. A dispenser, for instance, should only hold the approved solution, in the amount and format the maker recommends.
Dock schedules depend on how often you mop, the amount of dirt your floors collect, and the machine’s design. If an odor comes from the dock rather than the pad, inspect the dirty-water tank and tray first. Persistent smells, a leak, or a drying fault may need service beyond routine cleaning.
Follow a quick routine that fits your home
A short after-run routine can keep the robot ready without turning cleaning into a project. Begin with the pad and tank, then look over the places where dirt tends to gather. Adjust how often you inspect wheels and the dock to your floors, pets, water, and cleaning schedule.
- Remove the pad. Rinse or wash it as directed, check for damage or lingering odor, and let it dry fully.
- Empty the tank. Rinse it if the manual says to, and use only the approved water or solution.
- Look at the outlets and underside. Clear visible debris gently and check that wheels and mop plates move freely.
- Wipe sensors and contacts. Use the method specified for your model and confirm the robot can sit properly on its dock.
- Check the dock and parts periodically. Empty dirty water, clean trays and filters as directed, inspect wear, and install available software updates if appropriate.
For a small home where the robot runs twice a week, you may do the first two steps after each run and take a closer look at the wheels or dock during a weekly tidy. A busy household with pets may need more frequent checks. The manual’s care schedule is your guide when it differs from this general routine.
This routine works like putting garden tools away after watering: rinse what got dirty, let it dry, and put it back where it belongs. If you only have a few minutes, the pad and tank are a sensible place to start. Add the other checks when you see a clue such as streaking, tangles, or a charging problem.
Match the fix to the problem you can see
Streaks, odors, and uneven wetting often point to different parts of the routine. Start with visible clues: a dirty pad can smear grime, stagnant water or a damp cloth can smell, and a blocked outlet or poorly seated tank can leave dry tracks. Change one thing at a time so you can tell what helped.
| What you notice | What to check first | Why it may help |
|---|---|---|
| Streaks after a run | Pad cleanliness, wear, and floor settings | A dirty pad or unsuitable setting can spread residue. |
| Musty or sour smell | Damp pad, standing water, dirty-water tank, or dock tray | Moist residue may be the source of the odor. |
| Uneven wetting | Tank seating and water outlets | A loose tank or blocked path can affect water delivery. |
| Robot wanders or stalls | Wheels, sensors, obstacles, and map settings | Debris or unclear sensing can affect movement. |
| Robot will not charge | Contacts, dock alignment, and debris | A clean, secure connection can restore charging. |
For example, if streaks appear only in the dining room, inspect the pad and the floor setting before cleaning every part of the machine. If the robot leaves dry tracks across several rooms, check water delivery and tank placement. This kind of small, focused check saves time and gives you a clearer answer.
Routine care has limits. Persistent leaks, unusual noises, charging failures, or repeated navigation errors may signal a worn part or fault. Stop using the machine if the manual advises it, and contact the manufacturer or a qualified repair service for model-specific help.
Frequently Asked Questions
How often should I clean my robot mop?
Rinse or wash the pad and empty the tank after each run, following your model’s instructions. Check wheels, sensors, outlets, and the dock as needed, and use the manual for deeper cleaning and part replacement.
Can I leave water in the tank between uses?
It is generally better to empty the tank after use, especially if the robot will sit for a while. Check your model’s manual for its specific advice on rinsing and drying the reservoir.
Can I use vinegar, floor cleaner, or essential oils?
Use only liquids the manufacturer approves for your model. Unapproved products may leave residue, clog water outlets, or damage parts, so don’t add a household cleaner just for fragrance.
Why does my robot mop smell?
A damp pad, standing water, residue in a tank, or a dirty dock tray can cause an unpleasant smell. Wash and fully dry the pad, empty containers, and clean the dock as directed in the manual.
Why is my robot mop leaving streaks or dry patches?
Check whether the pad is dirty or worn, the tank is seated correctly, and the water outlets are clear. Confirm the floor settings too; if the pattern continues, consult the manual for model-specific troubleshooting.
Do self-cleaning docks need maintenance?
Yes. Empty dirty-water containers, rinse trays, clear hair or debris, and maintain filters and drying components as directed. Automatic washing and drying reduce some hands-on work but do not keep the dock clean on their own.
Conclusion
Keep the routine plain: clean the pad, empty the tank, and follow your model’s instructions. Then check the wheels, outlets, sensors, contacts, and dock when your home’s floors or the robot give you a reason. A few minutes of care can help your little helper return to its work without carrying yesterday’s dirt into tomorrow.
Let the pad dry like a dishcloth in a kitchen window, and the robot will be ready for its next quiet trip across the floor.