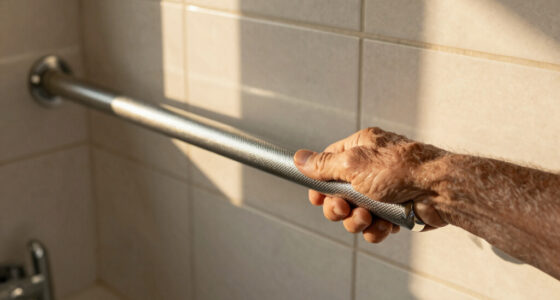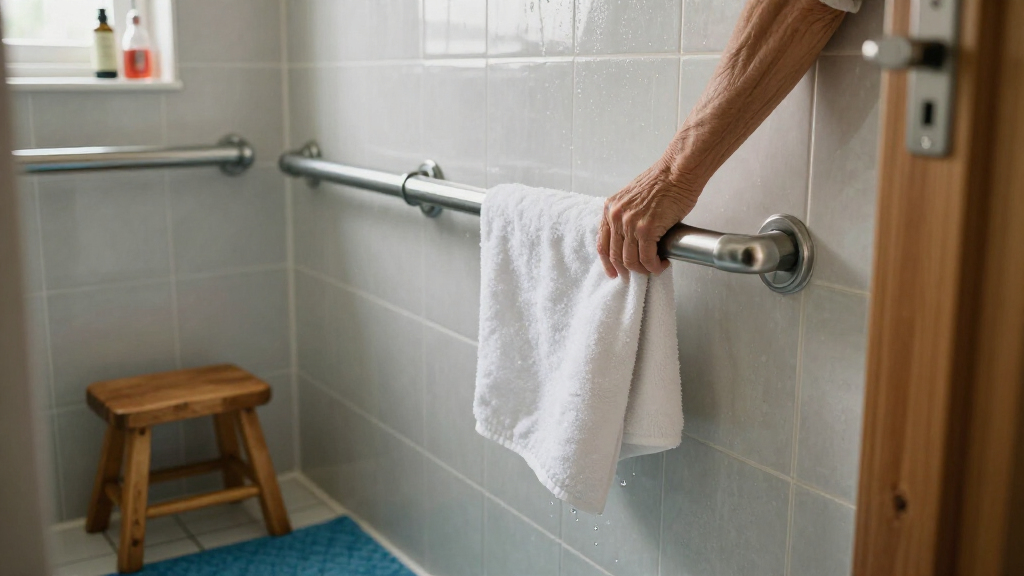

This guide helps family caregivers and older adults identify fall-risk locations, choose appropriate grab bars, and arrange secure installation. The goal is a support point the person can reach and grip during daily movement. Planning is beginner-friendly; mounting bars into suitable structure may require a qualified installer. Allow 1-3 hours for assessment and a straightforward installation, plus scheduling time if professional help is needed.

Turn quiet afternoons into listening time
- Thousands of audiobooks, podcasts and originals
- Listen on your phone, tablet or Echo — also offline
- Cancel anytime

TAILI 16.8-inch Suction Shower Grab Bars, 2 Pack, Grey
- ✔ Brand: TAILI
- ✔ Pack size: 2 grab bars
- ✔ Length: 16.8 inches

LEVERLOC Grab Bars for Shower, 2 Pack, 16.8 inches, Grey
- ✔ Brand: LEVERLOC
- ✔ Pack size: 2 grab bars
- ✔ Length: 16.8 inches

LEVERLOC 2 Pack Suction Grab Bars for Bathtubs and Showers, 12 Inch Waterproof Bathroom Safety Handles for Seniors and Elderly
- ✔ Brand: LEVERLOC
- ✔ Pack size: 2 grab bars
- ✔ Length: 12 inches
Difficulty: Intermediate | Time: 1-3 hours for planning and installation; longer if a professional is needed
What You’ll Need
Tools & Materials:
- Tape measure
- Pencil and painter’s tape
- Grab bars rated for the user’s needs and intended location
- Stud finder or other wall-structure locator
- Drill and bits suitable for the wall and fasteners, if installing yourself
- Level
- Manufacturer-specified fasteners and sealing materials
Knowledge:
- Basic ability to observe and describe how the person moves and transfers
- Ability to follow the grab bar manufacturer’s installation instructions
- Understanding that wall anchors and tile alone may not provide safe structural support
Ask the intended user, and their occupational or physical therapist if available, which movements feel unstable. A grab bar must be secured to framing or an approved mounting system appropriate for the wall. If the wall structure is unclear, the bar is near plumbing or wiring, or the user needs substantial weight-bearing support, arrange installation by a qualified professional.
TAILI 16.8-inch Suction Shower Grab Bars, 2 Pack, Grey
We put TAILI first because it combines a 16.8-inch handle with the only explicit maximum-load figure in this group: 240 pounds. That specification gives shoppers more information than the LEVERLOC listings provide, but it must be read cautiously. The product is described for bathroom safety and support; the supplied details do not establish that it is appropriate for pulling up or taking a senior’s full body weight. We would treat it as a balance aid, not as a fixed grab bar.Compared with LEVERLOC’s 12-inch pair, TAILI gives the hand more room to find a comfortable position. It also arrives as a two-pack, which can help place a hold at more than one point, provided both locations have compatible surfaces. The plastic construction and anti-slip strips focus the offer on easy, removable use rather than permanent installation. Its central drawback is the same one that governs every suction option here: the wall surface and attachment matter. A capacity claim cannot overcome unsuitable tile, poor placement, or a suction cup that loses its seal. Choose it for supplementary steadiness on smooth, non-porous surfaces; skip it when a user needs a dependable weight-bearing anchor.
Pros:
- Two handles provide placement flexibility
- 16.8-inch length offers more grip area than the 12-inch LEVERLOC pair
- Stated maximum load capacity of 240 pounds
- Removable installation avoids drilling and includes anti-slip strips
Cons:
- Limited to smooth, non-porous surfaces
- Suction can lose grip if the surface or installation is unsuitable
- The stated capacity should not be taken as proof of safe full-body support
Best for: Seniors who want two longer removable handles for balance assistance on compatible smooth bathroom surfaces and value having a stated maximum-load specification.
Not ideal for: Anyone needing to pull up, transfer substantial body weight, or install a handhold on porous, textured, or uneven walls.
Bottom line: We rank TAILI first for its longer two-handle format and clearer stated capacity, while recommending it only as supplementary balance support.
“We rank TAILI first for its longer two-handle format and clearer stated capacity, while recommending it only as supplementary balance support.”
LEVERLOC Grab Bars for Shower, 2 Pack, 16.8 inches, Grey
This LEVERLOC set makes the most sense when a buyer wants the longer reach of TAILI but prefers the listing’s emphasis on rubber construction and wet-grip texture. At 16.8 inches, each bar offers more hand placement room than the brand’s 12-inch model. The product information also describes quick, tool-free attachment and reusable suction mounting, which may suit a household that wants to reposition a balance aid without drilling.Compared with TAILI, however, this listing does not provide a maximum load figure, and it explicitly says the bars are not for supporting full body weight. That makes its intended role clearer but leaves less numeric information for comparison. It is best understood as a steadying handle on compatible tile or glass, not a rescue point for a slip or a transfer. The two-pack offers placement flexibility, but both handles remain dependent on smooth, non-porous surfaces. Skip this model if the senior needs a fixed anchor, or if the bathroom has textured tile, grout-heavy placement areas, or other surfaces that cannot hold suction reliably.
Pros:
- Two 16.8-inch bars provide more handhold length than the 12-inch option
- Rubber grip and anti-slip surface are intended for wet use
- Tool-free suction installation is removable and reusable
- Grey finish offers a neutral bathroom look
Cons:
- Not designed to support full body weight
- No maximum load capacity is specified in the supplied details
- Restricted to smooth, non-porous surfaces such as suitable tile or glass
Best for: Seniors who want two longer suction handles for light balance assistance and prefer the stated rubber grip and reusable, tool-free format.
Not ideal for: People who need a weight-bearing bar, want a published load capacity, or have rough or porous bathroom surfaces.
Bottom line: We recommend this LEVERLOC set over the 12-inch version when extra grip length matters, but not when the user needs substantial support.
“We recommend this LEVERLOC set over the 12-inch version when extra grip length matters, but not when the user needs substantial support.”
LEVERLOC 2 Pack Suction Grab Bars for Bathtubs and Showers, 12 Inch Waterproof Bathroom Safety Handles for Seniors and Elderly
LEVERLOC’s 12-inch pair is the compact choice in this roundup. That shorter length can be useful when a shower has limited wall space or when a senior wants a small balance handle rather than a broad grip. Its curved ergonomic design and non-slip grip are intended to make it easier to steady a hand in a wet area, while suction mounting avoids drilling. For a carefully matched surface and modest balance needs, this is a straightforward supplemental option.The tradeoff against both 16.8-inch models is reach: a shorter bar gives the user less room to adjust hand position and may be harder to grasp if placement is not precise. The supplied information also states plainly that it is not designed to bear body weight, so the smaller size should not be mistaken for a support handle for standing, lifting, or transfers. Compared with the longer LEVERLOC set, this pair is easier to fit into a compact layout but less versatile for varied grip positions. As with TAILI and the other LEVERLOC model, smooth, non-porous surfaces are essential; skip it if the wall is rough or if the senior needs a permanently anchored safety bar.
Pros:
- Compact 12-inch length can fit where longer bars may not
- Two handles allow more than one potential placement
- Curved grip and non-slip features are intended for wet conditions
- Installs and removes without drilling
Cons:
- Shorter grip provides less hand-placement room than either 16.8-inch set
- Not designed to support body weight
- Requires smooth, non-porous surfaces
Best for: Seniors with modest balance needs who want a compact pair of removable handles for a small shower or bathtub area.
Not ideal for: Users who need a longer handhold, must pull or lean heavily, or have textured, uneven, or porous walls.
Bottom line: Choose this pair for compact, light balance assistance; choose either longer set when a wider gripping area is more useful.
“Choose this pair for compact, light balance assistance; choose either longer set when a wider gripping area is more useful.”
As an Amazon Associate we earn from qualifying purchases.
Before You Start
Do not use a towel bar, suction cup bar, soap dish, or shower fixture as a body-support handle. These items may detach under load. Check the bar’s stated weight rating and installation requirements, and remember that the rating depends on correct mounting. Keep the bathroom dry and clear while measuring. Do not begin drilling until you have checked for pipes and electrical wiring and identified a suitable mounting location.
Step-by-Step Instructions
Step 1: Watch the person’s usual movements
Observe how the person enters and leaves the bathroom, sits on and rises from the toilet, steps into or out of the bath or shower, and moves while bathing. Ask where they feel unsteady and which hand they naturally use for support. Note any walker, cane, limited reach, painful shoulder, or difficulty standing.
Tip: Assess the person’s actual routine and reach rather than choosing locations based only on a standard layout.
Check: You have a short list of specific movements that need support and the side or direction from which the person approaches.
Step 2: Mark priority support locations
Mark possible bar locations with painter’s tape near the toilet, shower or tub entrance, and any other route where the person loses balance. Consider where a hand can reach before a transfer begins and where it can remain in reach during the movement. Keep bars clear of doors, controls, shelves, and the person’s path.
Tip: A bar positioned for standing may not help with a seated transfer. Mark locations while the user demonstrates or describes the movement, with a caregiver nearby for safety.
Check: Each proposed location corresponds to a particular movement and is reachable without twisting or leaning far.
Step 3: Choose bars for the location and user
Select bars designed for the environment, such as corrosion-resistant models for wet areas. Choose a length, shape, and grip surface the user can hold comfortably. Confirm the product’s load rating, compatible mounting surfaces, required fasteners, and installation directions. Ask a therapist or qualified installer for help choosing a configuration when the user has limited grip or needs help bearing weight.
Tip: A longer bar can provide more hand-placement options, but it still needs suitable structural support along its mounting points.
Check: The selected bar is intended for the location, fits the user’s hand and reach, and has clear mounting instructions.
Step 4: Confirm wall structure and safe placement
Locate studs or another manufacturer-approved structural support at every required mounting point. Check the area for plumbing and electrical wiring using appropriate methods. Compare the available structure with the bar’s mounting-hole pattern. If the holes do not align with secure support, stop and ask a qualified installer about a suitable solution.
Tip: Tile, drywall, and adhesive alone are not reliable support for a person pulling or leaning on a bar. Do not substitute generic anchors for the specified mounting system.
Check: You can identify secure support for all mounting points and have ruled out likely conflicts with pipes or wiring.
Step 5: Set height and orientation for the user
Hold the bar at the proposed position and ask the user to reach for it from the relevant standing or seated position. Adjust the height and angle so the hand can close around the grip without shoulder strain, awkward bending, or a long reach. Check that the bar can be grasped before the user starts moving and throughout the transfer.
Tip: There is no single height that suits every person or movement. Follow professional guidance when available and let the user test the reach without relying on an uninstalled bar.
Check: The user can reach the marked position comfortably from the intended starting position, with the bar clear of nearby fixtures.
Step 6: Install the bar or schedule professional mounting
Install the bar by marking the mounting holes, drilling with the specified bit, and attaching the bar using the included or approved fasteners, provided you have the required skills and the wall meets the product instructions. Follow the manufacturer’s sequence and sealing directions, especially in wet areas. Tighten each fastener as directed. If any step differs from the wall or instructions, stop and hire a qualified installer instead of improvising.
Tip: Do not drill until you are confident about hidden plumbing and wiring. Keep the user away from the work area until tools and debris are cleared.
Check: The bar sits flush as intended, all specified fasteners are installed, and the wall finish is sealed according to instructions.
Step 7: Check the installation before use
Inspect each mounting point for gaps, movement, cracked tile, or damage. Apply firm pressure by hand in the directions the bar will be used, following any test method supplied by its manufacturer. Do not have the user pull on a bar that moves or appears damaged. Contact the installer if you find looseness, shifting, or compromised wall material.
Tip: A brief hand check does not replace correct structural installation or a professional inspection when one is needed.
Check: The bar remains firmly fixed during the manufacturer’s recommended check, with no visible movement or wall damage.
Step 8: Practice the movement with supervision
Show the user where to place their hand and practice the relevant transfer slowly, with a caregiver close by. Ask whether the grip and position feel comfortable. Adjust the plan with a therapist or installer if the user must twist, reach, or change balance to use the bar. Keep the floor dry during practice.
Tip: A grab bar supports movement; it does not replace supervision or a mobility aid when those are needed.
Check: The user can find and grasp the bar during the intended movement without losing balance or reaching awkwardly.
Common Mistakes to Avoid
- Mounting a bar only into tile or drywall, or using an ordinary wall anchor. — Use framing or a mounting system explicitly approved for the wall and bar. Bring in a qualified installer if support is uncertain.
- Placing a bar where it looks convenient but the user cannot reach it during a transfer. — Base placement on the person’s actual movements and check reach from seated and standing positions before drilling.
- Treating a towel rail, suction handle, or shower fixture as a grab bar. — Use only a purpose-made support bar installed according to its instructions.
- Skipping checks after installation or using a loose bar. — Inspect the bar and wall before use and arrange repair promptly if any part shifts, loosens, or cracks.
Troubleshooting
Problem: No stud or support lines up with the bar’s mounting holes.
Solution: Do not move ahead with improvised anchors. Ask a qualified installer about a compatible structural mounting plate, a different bar, or another safe location.
Problem: The wall surface cracks or the bar shifts during installation or checking.
Solution: Stop using the bar and keep the user away from it. Contact a qualified installer to assess the wall and repair or remount the bar.
Problem: The user can reach the bar but finds the grip uncomfortable or awkward.
Solution: Recheck the bar’s orientation, diameter, and position with the user and, if available, a therapist. Change the setup before relying on it.
Problem: Water collects around the mounting points or the seal appears damaged.
Solution: Avoid using the bar until the installation and seal have been inspected. Have the installer restore the required water protection.
What Success Looks Like
The completed setup has purpose-made bars at locations matched to the user’s routine. Each bar is mounted to suitable structural support with the specified fasteners, shows no movement or wall damage, and can be reached and gripped comfortably during the intended movement. The user has practiced with supervision and knows to ask for help if a bar loosens or the layout becomes difficult to use.
Next Steps
Recheck each bar regularly and after any wall repair, impact, or sign of loosening. Keep floors dry, remove clutter, and maintain clear access to the bars. Reassess placement if the user’s strength, balance, mobility aid, or bathroom routine changes. Ask an occupational or physical therapist about other fall-prevention changes, such as lighting, nonslip flooring, or a shower seat.
Frequently Asked Questions
Can I install a grab bar with suction cups?
Suction models may serve as temporary balance aids only when the manufacturer permits that use, but they should not be treated as structural support for pulling or bearing body weight. For dependable fall-prevention support, use a purpose-made bar mounted to suitable structure.
Where should a bathroom grab bar go?
Common locations include near the toilet and at the bath or shower entry, but the best position depends on the user’s reach and movement. Mark the location while considering how the person approaches, sits, stands, and transfers.
Does a grab bar need to hold the person’s full weight?
Some users rely heavily on a bar during transfers, so choose a product and mounting method rated for the expected load. Ask a therapist or installer to help determine the right setup when the person needs substantial weight-bearing support.
How often should I check a grab bar?
Inspect it regularly and after nearby repair work, an impact, or any sign of movement. Follow the product instructions for maintenance, and stop using it if a fastener loosens, the wall cracks, or the bar shifts.
Halloween Picks
halloween
As an affiliate, we earn on qualifying purchases.